Vintage Maraschino Cherry Cake
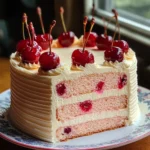
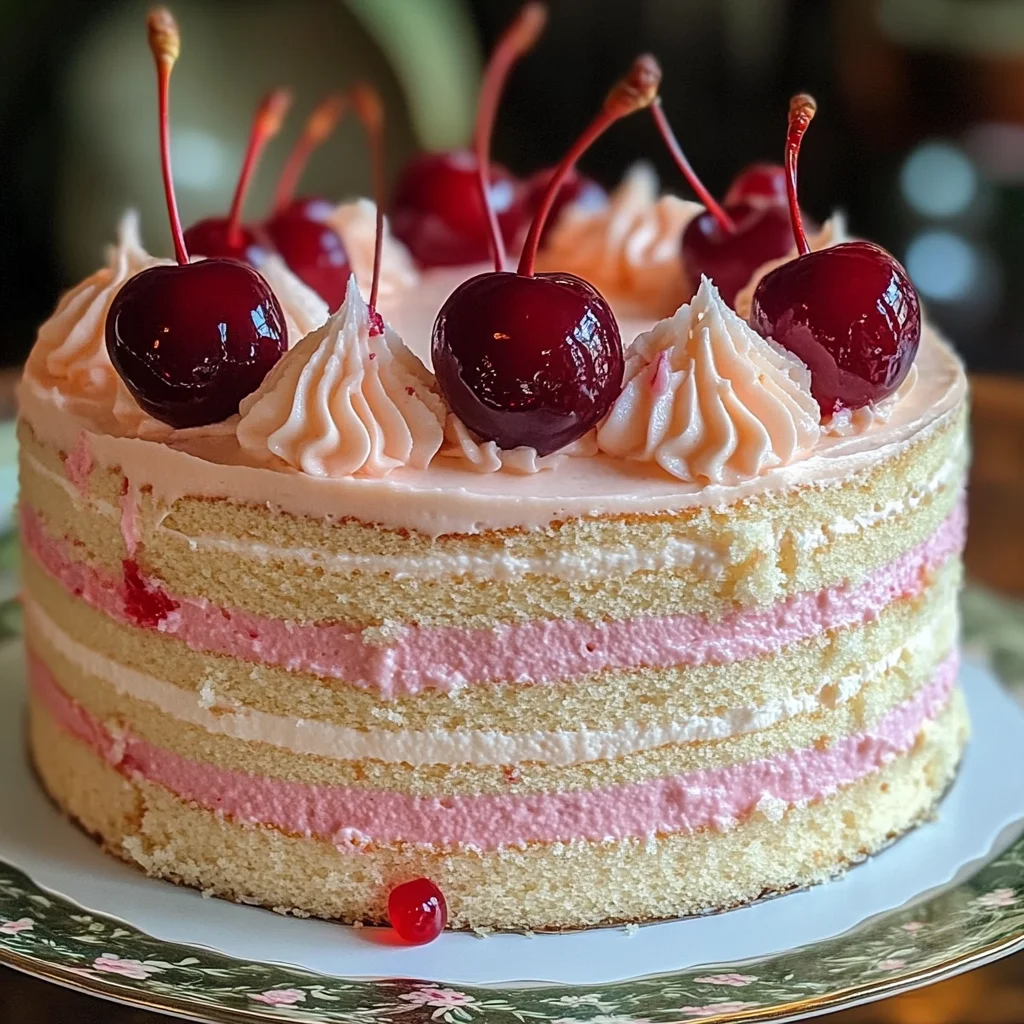
If you’re looking for a sweet slice of nostalgia, this Vintage Maraschino Cherry Cake is just the treat you need! I remember my grandmother always making this delightful cake for special occasions, and it never failed to bring smiles all around. With its soft texture and that lovely pink hue, it’s not just a dessert; it’s a memory wrapped in frosting. Whether you’re celebrating a birthday, hosting a family gathering, or simply want to indulge in something delicious, this cake is perfect for any occasion.
It’s so easy to make too! You’ll find that the ingredients are simple and wholesome, making it a great choice for bakers of all skill levels. Plus, who can resist the flavor of maraschino cherries? Let’s dive into why this recipe is bound to become a favorite in your home!
Why You’ll Love This Recipe
- Nostalgic Flavor: The sweet taste of maraschino cherries brings back fond memories with every bite.
- Easy to Make: With straightforward steps, you’ll have this cake ready in no time.
- Family-Friendly: Kids and adults alike will adore this beautiful treat!
- Perfect for Any Occasion: Birthdays, holidays, or just because—this cake fits right in.
- Make-Ahead Convenience: Bake it in advance and frost when you’re ready to serve!
Ingredients You’ll Need
Let’s gather our ingredients! This Vintage Maraschino Cherry Cake uses simple, wholesome items that you probably already have in your pantry. Here’s what you’ll need:
For the Cake
- 2 ½ cups all-purpose flour
- 2 ½ teaspoons baking powder
- ½ teaspoon salt
- ¾ cup unsalted butter, softened
- 1 ¾ cups granulated sugar
- 4 large eggs
- ½ cup maraschino cherry juice
- ½ cup milk
- 2 teaspoons vanilla extract
- ¾ cup maraschino cherries, chopped
For the Frosting
- 1 cup unsalted butter, softened
- 4 cups powdered sugar
- 2 tablespoons maraschino cherry juice
- 1 teaspoon vanilla extract
- 2 tablespoons milk (if needed for consistency)
- Whole maraschino cherries for garnish
Variations
This recipe is wonderfully flexible! If you’re feeling creative or want to try something different, consider these variations:
- Add Some Nuts: Chopped walnuts or pecans can give extra crunch and flavor!
- Change Up the Frosting: Try a cream cheese frosting for a tangy twist.
- Make It Chocolate: Add cocoa powder to the batter for a chocolate version of this classic.
- Switch the Cherries: Use fresh cherries when they’re in season for a fresh taste!
How to Make Vintage Maraschino Cherry Cake
Step 1: Preheat & Prepare Pans
Preheat your oven to 350°F (175°C). Greasing and flouring your cake pans is crucial. It helps prevent sticking and ensures your cakes come out beautifully shaped.
Step 2: Mix Dry Ingredients
In a medium bowl, whisk together the flour, baking powder, and salt. This step ensures that your leavening agent is evenly distributed throughout the flour for a fluffy cake.
Step 3: Cream Butter & Sugar
In a large mixing bowl, beat the softened butter and granulated sugar together until light and fluffy. This process incorporates air into the mixture and contributes to that tender crumb we love.
Step 4: Add Eggs & Flavorings
Beat in each egg one at a time. This helps maintain an even consistency. Then mix in the vanilla extract and maraschino cherry juice—this will add an irresistible flavor right from the start!
Step 5: Incorporate Dry Ingredients & Milk
Gradually add your dry ingredient mixture in three parts while alternating with milk. Mixing just until combined is key; overmixing can lead to a dense cake.
Step 6: Fold in Cherries
Gently fold in those chopped maraschino cherries. This adds bursts of sweet flavor throughout your cake.
Step 7: Bake the Cakes
Divide the batter between your prepared pans. Bake them for about 25-30 minutes or until a toothpick comes out clean from the center. This will give you perfectly baked layers!
Step 8: Cool Completely
After removing from the oven, let your cakes cool in the pans for about 10 minutes before transferring them to a wire rack. Cooling completely is important before frosting; otherwise, it might melt!
Step 9: Prepare the Frosting
Beat your softened butter until creamy. Gradually mix in powdered sugar until smooth. Then add maraschino cherry juice and vanilla extract; adjust with milk if needed for spreadability.
Step 10: Assemble & Decorate
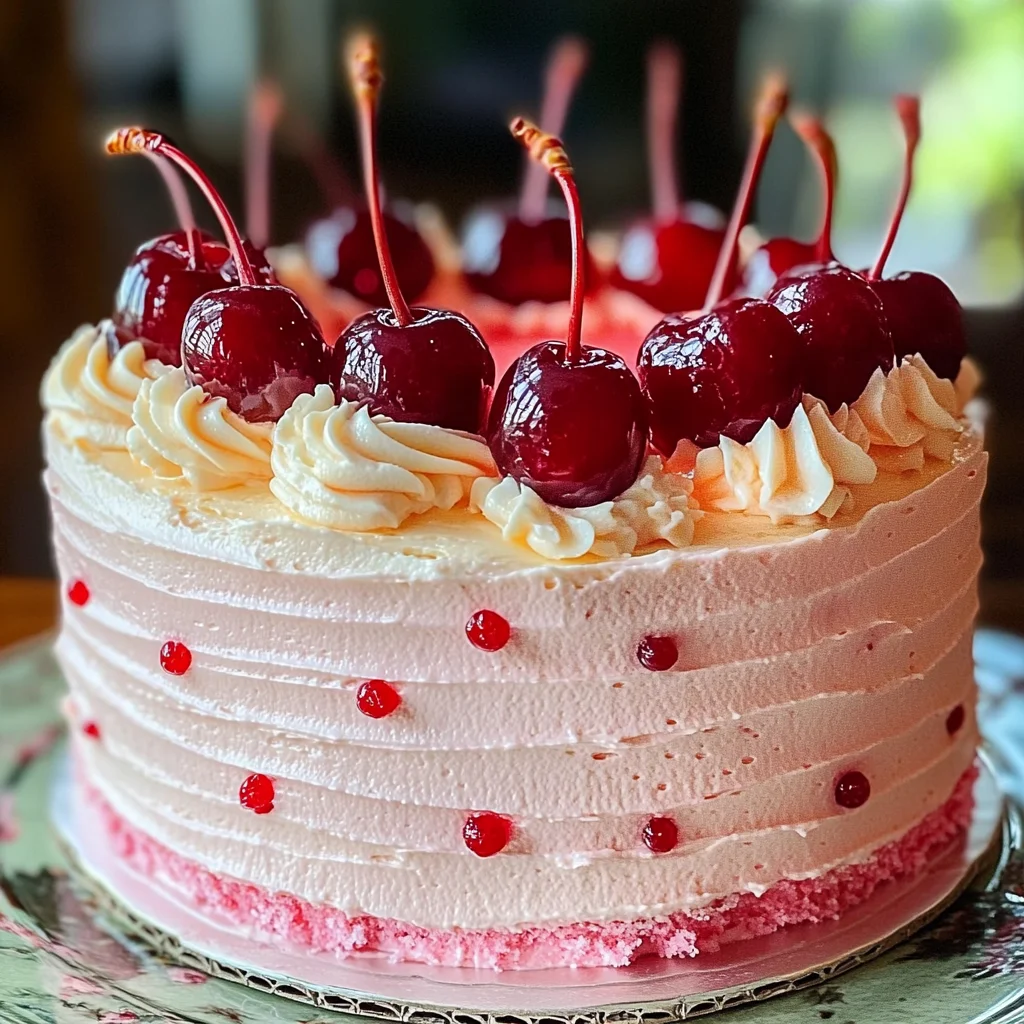
Spread frosting over one layer of cake before stacking on the second layer. Frost the entire cake generously! Top it off with whole maraschino cherries for that classic vintage look.
And there you have it! Your own Vintage Maraschino Cherry Cake ready to be enjoyed. I can’t wait for you to share this delightful dessert with your loved ones!
Pro Tips for Making Vintage Maraschino Cherry Cake
Baking this delightful cake is a joy, and with a few handy tips, you’ll ensure it turns out perfectly every time!
-
Use Room Temperature Ingredients – Allow your butter, eggs, and milk to come to room temperature before mixing. This helps create a smooth batter and ensures even baking.
-
Don’t Overmix – When incorporating the dry ingredients, mix just until combined. Overmixing can lead to a dense cake instead of the light and fluffy texture you want.
-
Test for Doneness – Insert a toothpick into the center of the cakes to check if they’re done. If it comes out clean or with just a few crumbs attached, your cakes are ready!
-
Cool Completely Before Frosting – Let the cakes cool completely on a wire rack before adding frosting. This prevents the frosting from melting and sliding off.
-
Store Properly – Keep any leftover cake in an airtight container at room temperature for up to 3 days. For longer storage, refrigerate or freeze slices wrapped tightly.
How to Serve Vintage Maraschino Cherry Cake
Presenting your Vintage Maraschino Cherry Cake beautifully can enhance its appeal! Here are some ideas to make it stand out on your table.
Garnishes
-
Whole Maraschino Cherries – Placing whole cherries on top not only adds an authentic vintage touch but also enhances the flavor.
-
Whipped Coconut Cream – A dollop of whipped coconut cream can add a light, fluffy contrast to the rich frosting, making each bite even more enjoyable.
Side Dishes
-
Fresh Fruit Salad – A colorful mix of seasonal fruits provides a refreshing balance to the sweetness of the cake and adds a healthy touch.
-
Vanilla Ice Cream – A scoop of vanilla ice cream pairs wonderfully with the cake’s cherry flavors and adds a creamy element that everyone loves.
-
Coffee or Tea – Serving your cake with a nice cup of coffee or herbal tea can enhance the overall experience, making it perfect for afternoon gatherings or dessert after dinner.
These simple serving suggestions will elevate your Vintage Maraschino Cherry Cake from delicious to extraordinary! Enjoy sharing this delightful treat with friends and family.
Make Ahead and Storage
This Vintage Maraschino Cherry Cake is perfect for meal prep and can be made ahead of time for special occasions or simply to enjoy throughout the week. Here’s how to keep it fresh and delicious!
Storing Leftovers
- Allow the cake to cool completely before storing.
- Place any leftover cake in an airtight container at room temperature for up to 3 days.
- For longer storage, refrigerate the cake, which can extend its freshness to about a week.
Freezing
- Wrap the cooled cake layers tightly in plastic wrap, then place them in a freezer-safe bag or container.
- For best quality, freeze the cake for up to 3 months.
- To freeze individual slices, cut the cake into portions and wrap each slice in plastic wrap.
Reheating
- If you want to enjoy your cake warm, preheat your oven to 350°F (175°C).
- Place the slice on a baking sheet and warm it for about 10-15 minutes, or until heated through.
- Alternatively, you can microwave individual slices for about 10-15 seconds.
FAQs
Here are some common questions you might have about making this delightful Vintage Maraschino Cherry Cake!
Can I use different types of cherries in my Vintage Maraschino Cherry Cake?
Absolutely! While maraschino cherries give this cake its classic taste and color, you can experiment with other sweet cherries or even dark cherries if you’re feeling adventurous.
How do I make my Vintage Maraschino Cherry Cake more festive?
To amp up the celebration vibes, consider adding colorful sprinkles on top of the frosting or using themed decorations that match your occasion.
What is the best way to store my Vintage Maraschino Cherry Cake?
The best way to store your cake is in an airtight container at room temperature for up to three days. For longer storage, refrigerate or freeze it as needed.
Can I make this Vintage Maraschino Cherry Cake gluten-free?
Yes! You can substitute all-purpose flour with a gluten-free flour blend that measures cup-for-cup in recipes. Just ensure that your other ingredients are also gluten-free!
Final Thoughts
I hope this Vintage Maraschino Cherry Cake brings a touch of nostalgia and sweetness to your table! With its soft texture and vibrant cherry flavor, it’s sure to become a favorite among friends and family. Enjoy every moment of making it – baking is not just about the end result but also about creating memories along the way. Happy baking!
Vintage Maraschino Cherry Cake
Indulge in the nostalgic delight of Vintage Maraschino Cherry Cake, a charming dessert that evokes sweet memories with every bite. This delightful cake is soft, fluffy, and beautifully accented with maraschino cherries, making it perfect for birthdays, family gatherings, or just a special treat for yourself. Topped with creamy frosting and garnished with whole cherries, this cake is not just a dessert; it’s an experience filled with joy and sweetness. Easy to prepare and bursting with flavor, it’s sure to become a favorite in your home.
- Prep Time: 20 minutes
- Cook Time: 30 minutes
- Total Time: 50 minutes
- Yield: Approximately 12 servings 1x
- Category: Dessert
- Method: Baking
- Cuisine: American
Ingredients
- 2 ½ cups all-purpose flour
- 2 ½ teaspoons baking powder
- ¾ cup unsalted butter
- 1 ¾ cups granulated sugar
- 4 large eggs
- ½ cup maraschino cherry juice
- ½ cup milk
- 1 cup powdered sugar (for frosting)
- Whole maraschino cherries (for garnish)
Instructions
- Preheat oven to 350°F (175°C) and grease two cake pans.
- In a bowl, whisk flour, baking powder, and salt together.
- Cream butter and sugar until fluffy. Add eggs one at a time along with vanilla extract and cherry juice.
- Gradually mix in dry ingredients alternately with milk until just combined.
- Gently fold in chopped cherries.
- Divide batter between prepared pans and bake for 25-30 minutes until a toothpick comes out clean.
- Let cakes cool completely before frosting with the mixture of butter, powdered sugar, cherry juice, and vanilla extract.
- Top each layer with whole cherries before serving.
Nutrition
- Serving Size: 1 slice (80g)
- Calories: 320
- Sugar: 28g
- Sodium: 140mg
- Fat: 14g
- Saturated Fat: 8g
- Unsaturated Fat: 5g
- Trans Fat: 0g
- Carbohydrates: 46g
- Fiber: <1g
- Protein: 3g
- Cholesterol: 55mg

