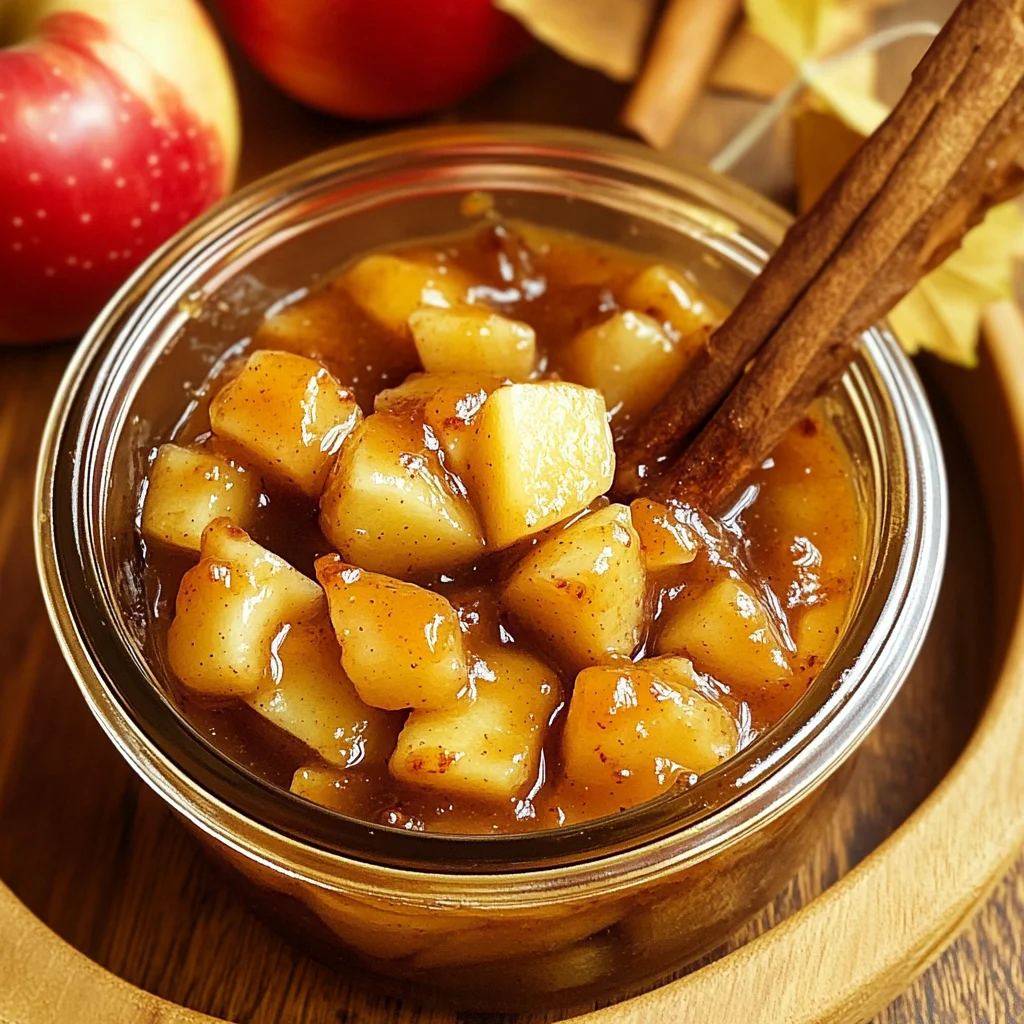
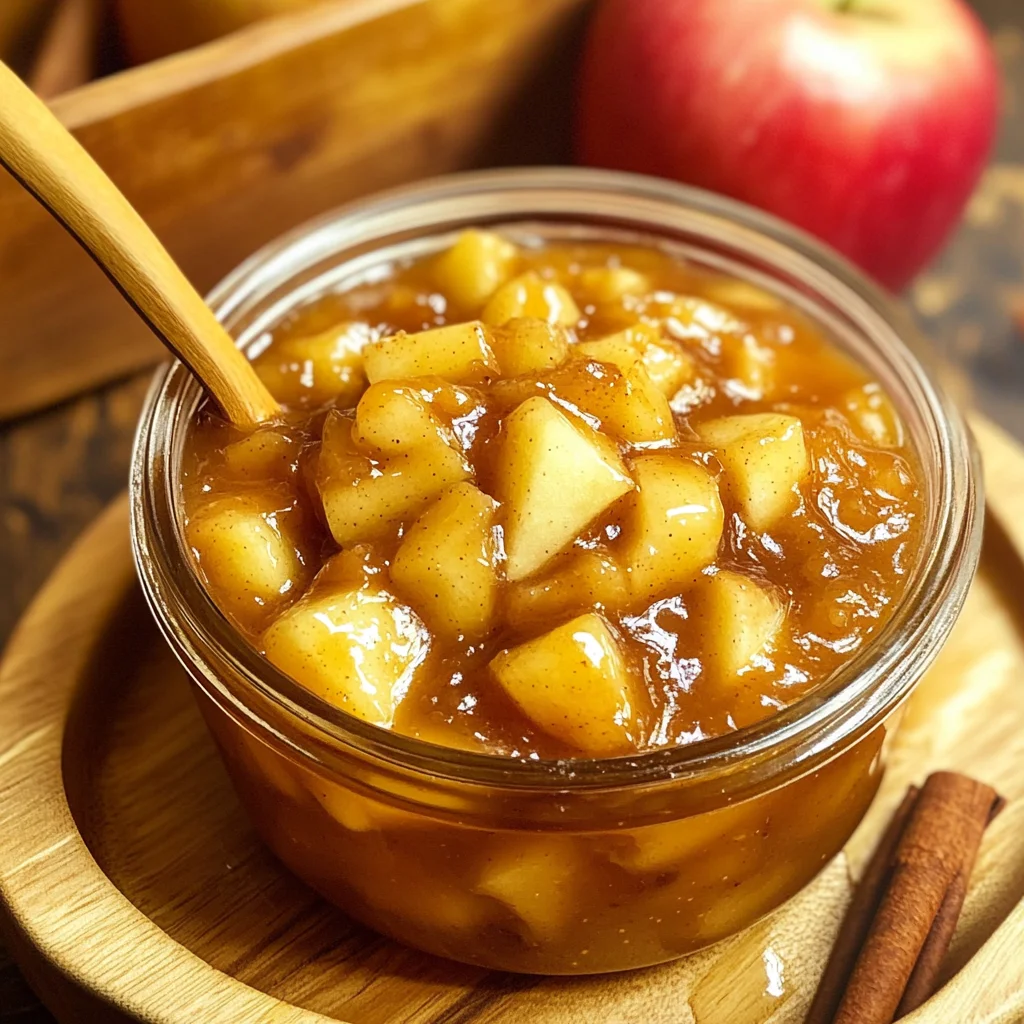
Homemade Apple Pie Filling
If you’re looking for the perfect way to capture the essence of autumn in a jar, look no further! This Homemade Apple Pie Filling is my absolute favorite recipe, and I’m so excited to share it with you. It brings together the warm flavors of cinnamon and nutmeg, wrapped around sweet, tender apples. It’s not just for pies; this filling can transform any dessert into a cozy treat. Whether you’re preparing for a family gathering or just want something sweet on a busy weeknight, this recipe is here to make your life easier and your desserts tastier!
What I love most about this Homemade Apple Pie Filling is its versatility. You can use it right away, can it for later, or even freeze it to enjoy throughout the year. Plus, it’s made from simple ingredients that you probably already have in your kitchen. Let’s get started on making some delicious memories!
Why You’ll Love This Recipe
- Easy Preparation: With just a few steps and common ingredients, making your own filling is a breeze!
- Family-Friendly Appeal: Everyone loves apple pie! This filling is sure to please kids and adults alike at any gathering.
- Make-Ahead Convenience: Prepare it in advance and store it for later use. Perfect for busy days when you need a quick dessert option.
- Delicious Flavor: The combination of fresh apples and warming spices creates an irresistible taste that’s hard to beat.
Ingredients You’ll Need
This recipe calls for simple, wholesome ingredients that come together beautifully. You’ll need:
For the Filling
- 9 cups fresh apples, peeled, cored, and chopped into uniform sizes
- 2 tablespoons lemon juice
- 3 cups white sugar
- 2 tablespoons brown sugar
- 1/2 cup cornstarch
- 1 teaspoon ground cinnamon
- 1/2 teaspoon ground nutmeg
- 1/2 teaspoon coarse sea salt
Variations
One of the best things about this Homemade Apple Pie Filling is how flexible it is! Feel free to get creative with these variations:
- Add Some Berries: Toss in some blueberries or raspberries for a fruity twist.
- Try Different Spices: Experiment with allspice or ginger for added warmth.
- Sweeten Naturally: Substitute some of the sugar with maple syrup or honey if you prefer a natural sweetener.
- Mix in Nuts: For added texture, stir in chopped walnuts or pecans.
How to Make Homemade Apple Pie Filling
Step 1: Prepare the Apples
In a large bowl, toss the peeled, cored, and chopped apples with lemon juice. This step is super important as it prevents the apples from browning too quickly. Set them aside while you prepare the sauce.
Step 2: Make the Sauce
In a large Dutch oven or saucepan, combine both sugars, cornstarch, cinnamon, nutmeg, and coarse sea salt. Then add 4 cups of water and bring everything to a low simmer. This mixture will thicken beautifully once we add the apples.
Step 3: Cook the Apples
Stir in your prepared apples and cover the pot. Cook for about 6-10 minutes—just enough time for those apples to become tender but still hold their shape. If you’ve cut them into smaller pieces, they’ll cook faster! The sauce should be thickened nicely by now.
Step 4: Cool Down
Remove the pot from heat and let your filling cool completely. This cooling step allows all those delicious flavors to meld together perfectly.
Step 5: Store Your Filling
Once cooled, you can use this delightful filling right away or store it by canning or freezing for future fun baking projects!
If you’ve tried this recipe, come back and let us know how it went in the comments or ratings!
Pro Tips for Making Homemade Apple Pie Filling
Making your own apple pie filling can be a breeze with a few helpful tips! Here are some recommendations to ensure your filling turns out perfectly every time.
-
Choose the right apples: Opt for a mix of tart and sweet apples like Granny Smith and Honeycrisp. This balance enhances the flavor and creates a delightful texture in your filling.
-
Uniform chopping: Cut your apples into equal sizes. This ensures that they cook evenly, resulting in a consistent texture throughout the filling.
-
Don’t skip the lemon juice: Tossing the apples in lemon juice not only prevents browning but also adds a subtle brightness to the flavor, balancing out the sweetness of the sugars.
-
Adjust spices to taste: Feel free to tweak the cinnamon and nutmeg amounts based on your preference. Some love a spicier kick, while others might enjoy a milder flavor profile.
-
Cool before storing: Allow your filling to cool completely before canning or freezing. This prevents condensation from forming, which could lead to ice crystals or spoilage.
How to Serve Homemade Apple Pie Filling
This homemade apple pie filling is incredibly versatile and can be used in various delightful ways! Whether you’re making traditional pies or exploring new desserts, here are some fantastic serving suggestions.
Garnishes
- Whipped coconut cream: A dollop of whipped coconut cream adds a creamy texture that complements the warm spices in the filling.
- Crushed nuts: Sprinkle some crushed walnuts or pecans on top for an added crunch and depth of flavor.
- Cinnamon sugar: A light dusting of cinnamon sugar can enhance sweetness and provide an enticing aroma.
Side Dishes
- Vanilla ice cream: The classic pairing! Creamy vanilla ice cream melts beautifully over warm apple pie filling, creating a comforting dessert experience.
- Shortbread cookies: These buttery cookies offer a delightful crunch and richness that contrasts nicely with the fruity filling.
- Oatmeal: Serve warm apple pie filling over oatmeal for a cozy breakfast option that feels indulgent yet healthy.
- Yogurt parfaits: Layer apple pie filling with yogurt and granola for a deliciously satisfying snack or light dessert that’s both refreshing and fulfilling.
Now you’re all set to create something delicious with this homemade apple pie filling! Don’t forget to share how it turned out in the comments below; I’d love to hear about your baking adventures!
Make Ahead and Storage
This Homemade Apple Pie Filling is perfect for meal prep! You can make it in batches and have it ready for all your baking needs. Here’s how to store it properly.
Storing Leftovers
- Store the apple pie filling in an airtight container.
- Keep it in the refrigerator for up to one week.
- Make sure to let the filling cool completely before sealing the container.
Freezing
- Portion the filling into freezer-safe bags or containers.
- Remove as much air as possible before sealing to prevent freezer burn.
- Label with the date and freeze for up to six months.
Reheating
- Thaw overnight in the refrigerator if frozen.
- To reheat, warm gently on the stovetop over low heat, stirring occasionally.
- You can also microwave in short intervals, stirring between, until heated through.
FAQs
If you have any questions about this recipe, you’re not alone. Here are some common inquiries that might help!
Can I make Homemade Apple Pie Filling without sugar?
Yes! You can substitute with natural sweeteners like maple syrup or honey. Just adjust the quantity based on your taste preference.
How long does Homemade Apple Pie Filling last?
When refrigerated, it lasts up to a week. For longer storage, freezing is ideal; it can maintain quality for up to six months.
What types of apples are best for Homemade Apple Pie Filling?
Firmer varieties like Granny Smith, Honeycrisp, or Braeburn work best as they hold their shape during cooking and provide a nice tart flavor.
Can I use this filling for other desserts?
Absolutely! This versatile filling is great for crumbles, tarts, and even as a topping for pancakes or waffles.
Final Thoughts
I hope you find joy in making this Homemade Apple Pie Filling! It’s a comforting addition to any dessert table and perfect for sharing with loved ones. Whether you use it immediately or save some for later, I know you’ll love the delightful flavors. Happy baking!
Homemade Apple Pie Filling

Indulge in the essence of fall with this Homemade Apple Pie Filling recipe. Bursting with the warm flavors of cinnamon and nutmeg, this delightful filling transforms simple desserts into cozy treats. Perfect for pies, crumbles, or as a topping for pancakes and yogurt parfaits, this versatile mixture is easy to prepare and can be made ahead of time. With just a handful of wholesome ingredients, you can capture the comforting taste of homemade apple pie in a jar. Whether you’re hosting a family gathering or just craving something sweet on a weeknight, this recipe will help you create delicious memories!
- Prep Time: 15 minutes
- Cook Time: 10 minutes
- Total Time: 25 minutes
- Yield: Approximately 8 servings 1x
- Category: Dessert
- Method: Cooking
- Cuisine: American
Ingredients
- 9 cups fresh apples, peeled, cored, and chopped
- 2 tablespoons lemon juice
- 3 cups white sugar
- 2 tablespoons brown sugar
- 1/2 cup cornstarch
- 1 teaspoon ground cinnamon
- 1/2 teaspoon ground nutmeg
- 1/2 teaspoon coarse sea salt
Instructions
- In a large bowl, toss the chopped apples with lemon juice to prevent browning. Set aside.
- In a Dutch oven or saucepan, mix sugars, cornstarch, cinnamon, nutmeg, and salt. Add 4 cups of water and bring to a low simmer until thickened.
- Stir in the prepared apples and cover. Cook for 6-10 minutes until apples are tender but hold their shape.
- Remove from heat and let cool completely before using or storing.
Nutrition
- Serving Size: 1/4 cup (60g)
- Calories: 159
- Sugar: 30g
- Sodium: 4mg
- Fat: 0g
- Saturated Fat: 0g
- Unsaturated Fat: 0g
- Trans Fat: 0g
- Carbohydrates: 39g
- Fiber: 2g
- Protein: <1g
- Cholesterol: 0mg