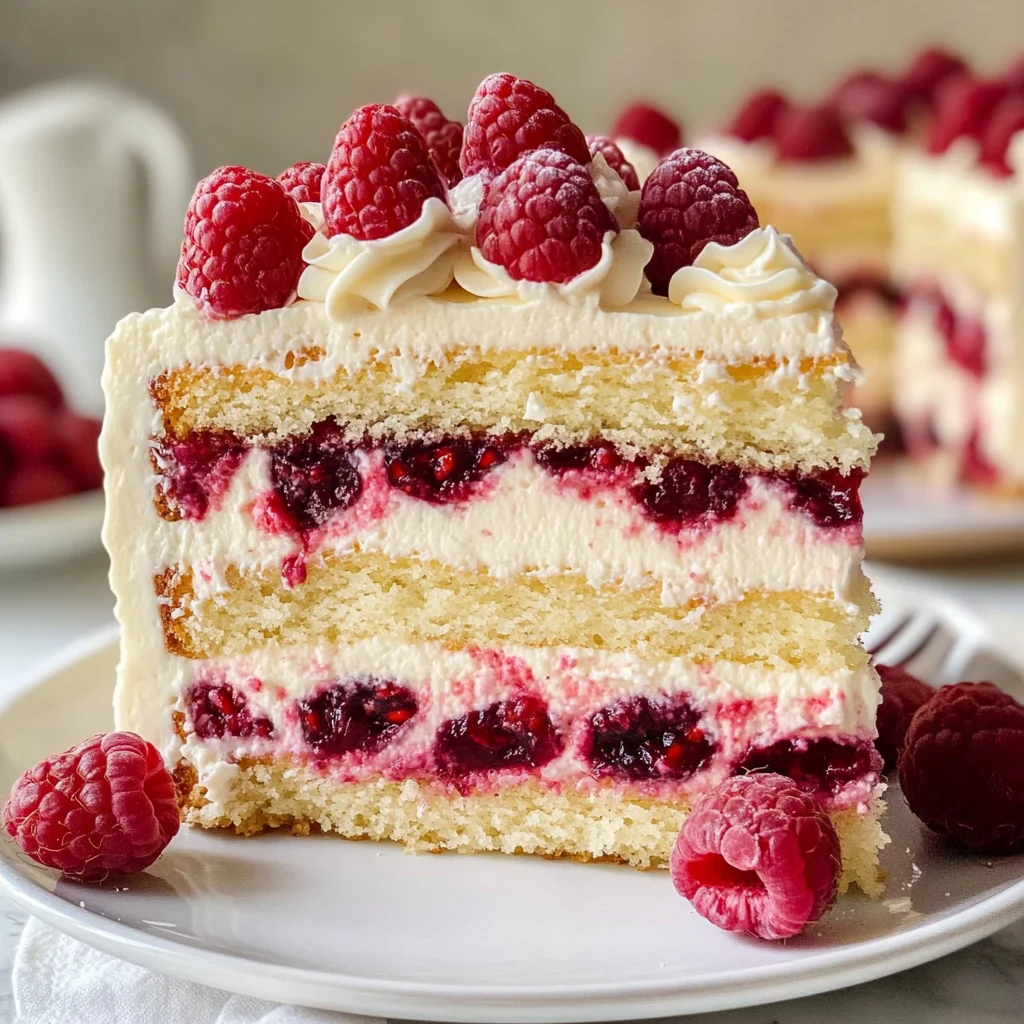
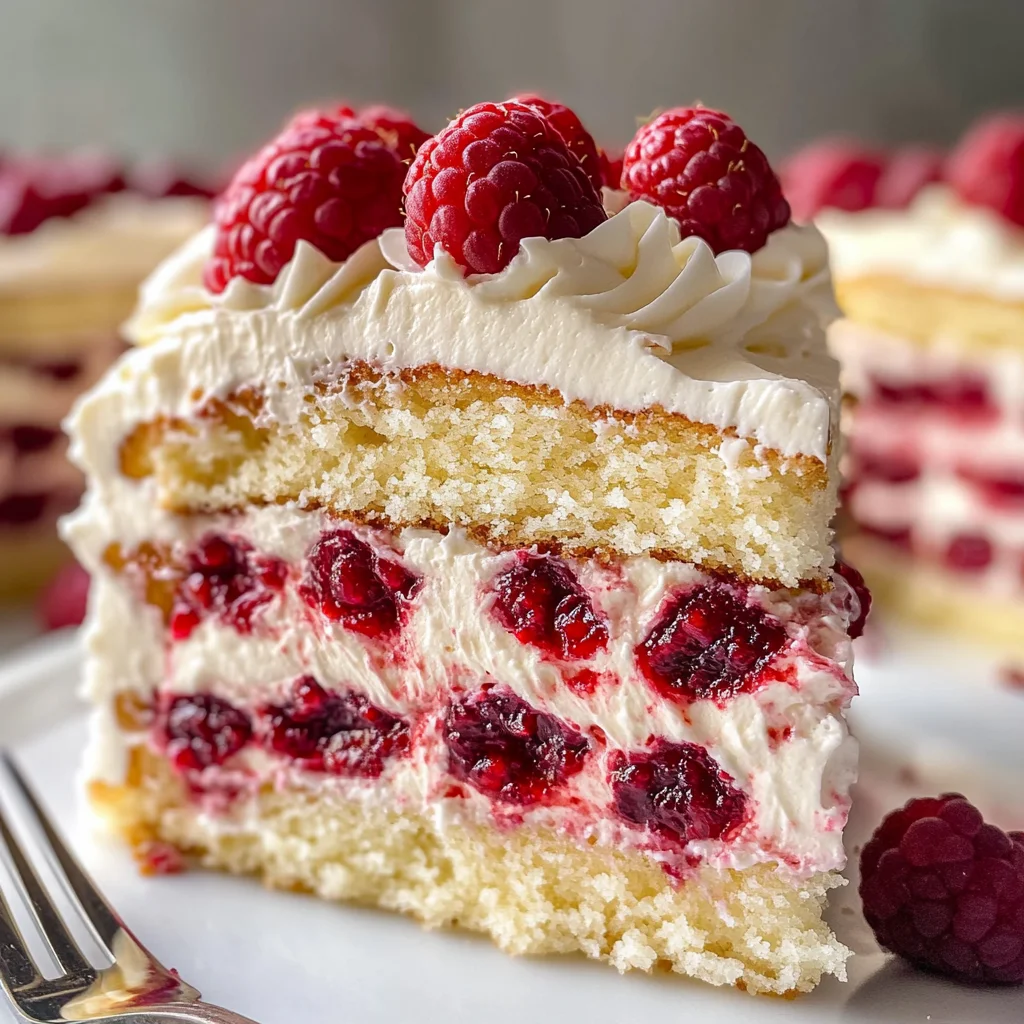
White Chocolate Raspberry Dream Cake
If you’re looking for a dessert that feels like a warm hug, then this White Chocolate Raspberry Dream Cake is just the treat for you! It’s a delightful blend of moist cake, rich white chocolate, and tangy raspberries that dance together in perfect harmony. This cake has become a staple at our family gatherings, and I can’t help but smile every time I serve it. Whether it’s a birthday celebration or just a cozy weeknight treat, this cake is sure to impress.
This recipe is not only delicious, but it’s also simple enough for bakers of all levels. Imagine the joy on your loved ones’ faces as they take their first bite—it’s truly a dream come true!
Why You’ll Love This Recipe
- Easy to make: With straightforward steps, you’ll have this dreamy cake ready in no time!
- Family-friendly: Kids and adults alike will adore the sweet and tangy flavors.
- Perfect for any occasion: Whether it’s a festive gathering or a simple dinner at home, this cake fits right in.
- Make-ahead convenience: Bake it ahead of time and chill for an easy dessert option later.
- Stunning presentation: The layers of white chocolate and raspberry create an eye-catching centerpiece.
Ingredients You’ll Need
Let’s gather some simple, wholesome ingredients to create this beautiful cake! No need for fancy items here—just good quality ingredients that will shine through in flavor.
For the Cake
- 2 1/2 cups all-purpose flour
- 2 teaspoons baking powder
- 1/2 teaspoon baking soda
- 1/2 teaspoon salt
- 1 cup unsalted butter
- 1 1/2 cups granulated sugar
- 4 large eggs
- 1 teaspoon vanilla extract
- 1 cup whole milk
- 1/2 cup sour cream
- 6 ounces white chocolate, melted
For the Filling
- 1 1/2 cups fresh raspberries
- 1/2 cup raspberry jam
For the Whipped Cream
- 2 cups heavy whipping cream
- 2 tablespoons powdered sugar
- 1 teaspoon vanilla extract
Variations
This recipe is wonderfully flexible! Here are some fun ideas to customize your White Chocolate Raspberry Dream Cake:
- Add lemon zest: Incorporating lemon zest into the batter adds a bright twist to the flavor profile.
- Use other berries: Swap out raspberries for strawberries or blueberries for different fruity variations.
- Try a different frosting: Use cream cheese frosting instead of whipped cream for added richness.
- Make it gluten-free: Substitute all-purpose flour with a gluten-free blend to cater to dietary needs.
How to Make White Chocolate Raspberry Dream Cake
Step 1: Preheat Your Oven
First things first! Preheat your oven to 350°F (175°C). This ensures that your cakes bake evenly and rise beautifully.
Step 2: Prepare Your Pans
Grease and flour two 9-inch round cake pans. This step is crucial as it helps prevent the cakes from sticking when you take them out.
Step 3: Mix Dry Ingredients
In a medium-sized bowl, whisk together the all-purpose flour, baking powder, baking soda, and salt until well combined. This helps to evenly distribute the leavening agents throughout the flour.
Step 4: Cream Butter and Sugar
In a large mixing bowl, cream together the unsalted butter and granulated sugar using an electric mixer on medium speed until light and fluffy. This should take about 3-4 minutes. Creaming incorporates air into the mixture, which gives your cake that delightful fluffiness!
Step 5: Add Eggs One at a Time
Add each egg one at a time, beating well after each addition. This ensures that the eggs are fully incorporated and contributes to a smooth batter.
Step 6: Incorporate Vanilla Extract
Mix in the vanilla extract until fully blended. The vanilla adds warmth and depth of flavor that complements the sweetness perfectly.
Step 7: Combine Milk and Sour Cream
In another bowl, combine whole milk and sour cream. Stir until smooth—this mixture adds moisture to your cake and richness from the sour cream.
Step 8: Alternate Dry Ingredients with Wet Mixture
Gradually add the dry ingredients to the butter mixture, alternating with your milk-sour cream mixture. Start and end with dry ingredients to keep everything balanced in texture.
Step 9: Beat Until Just Combined
Beat on low speed until just combined. Be careful not to overmix; this will keep your cake tender!
Step 10: Fold in Melted White Chocolate
Gently fold in the melted white chocolate using a spatula until fully incorporated. This adds luxurious flavor throughout your batter.
Step 11: Divide Batter Into Pans
Evenly divide your batter between the prepared cake pans. Smooth out tops with a spatula so they bake evenly.
Step 12: Bake
Bake for about 25-30 minutes or until a toothpick inserted into the center comes out clean. Baking times can vary depending on your oven!
Step 13: Cool Cakes
Remove from oven and let them cool in pans for about ten minutes before turning them out onto wire racks to cool completely. Cooling is essential; otherwise, your whipped cream will melt when you assemble!
Step 14: Prepare Raspberry Filling
While cakes cool, mash fresh raspberries in a bowl until broken down into smaller pieces. Stir in raspberry jam until fully mixed—this filling brings vibrant flavor!
Step 15: Make Whipped Cream
In another large bowl, beat heavy whipping cream with powdered sugar and vanilla extract on high speed until stiff peaks form. This creates light and airy whipped cream that pairs beautifully with our layers.
Step 16: Assemble Your Cake
Once cakes are completely cool, place one layer on a serving platter. Spread an even layer of raspberry filling over it followed by whipped cream—this layering creates stunning flavors with every slice!
Step 17: Top With Second Layer
Place second cake layer on top gently pressing down to secure it in place. Then spread remaining whipped cream over top and sides of cake.
Step 18: Garnish & Chill
Garnish with fresh raspberries arranged decoratively on top. Chill in refrigerator for at least an hour before serving so everything sets nicely.
Now you’re ready to serve up slices of this heavenly White Chocolate Raspberry Dream Cake! Enjoy every delightful bite!
Pro Tips for Making White Chocolate Raspberry Dream Cake
Creating this dreamy cake is a delightful experience, and a few tips can make your baking journey even smoother!
-
Use room temperature ingredients: Bring your eggs, butter, and milk to room temperature before mixing. This helps create a smoother batter and promotes even baking.
-
Measure flour correctly: To avoid a dense cake, use the spoon-and-level method to measure your flour. Too much flour can lead to a dry texture in your final product.
-
Don’t overmix the batter: Once you’ve added the dry ingredients, mix gently until just combined. Overmixing can result in tough cake layers that lack that light, fluffy texture we all love.
-
Cool completely before frosting: Patience is key! Allowing the cakes to cool completely prevents the whipped cream from melting and helps maintain that beautiful layered look.
-
Chill the whipped cream: If you chill your mixing bowl and beaters before whipping the cream, it will help achieve better volume and stability for decorating your cake.
How to Serve White Chocolate Raspberry Dream Cake
This White Chocolate Raspberry Dream Cake is not only a feast for the taste buds but also a visual delight. Here are some ideas to present this stunning dessert beautifully!
Garnishes
- Fresh mint leaves: A sprig of mint adds a pop of color and a refreshing aroma that complements the sweetness of the cake.
- White chocolate shavings: Sprinkle some finely shaved white chocolate on top for an elegant touch that enhances both flavor and appearance.
- Powdered sugar dusting: A light dusting of powdered sugar gives your cake a classic finish that looks as good as it tastes.
Side Dishes
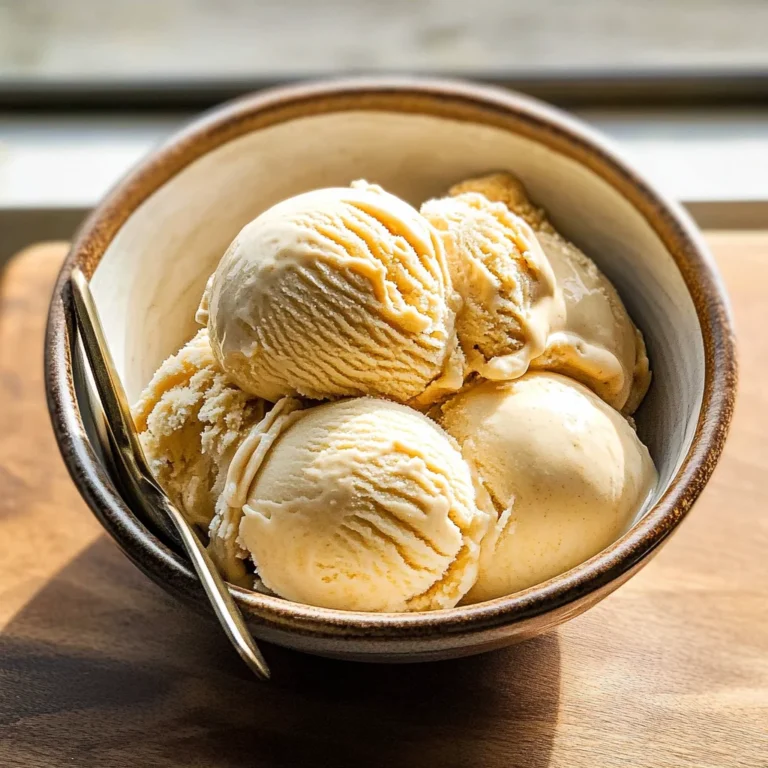
- Vanilla ice cream: The creamy texture and vanilla notes pair perfectly with the tartness of raspberries in the cake, creating an indulgent dessert experience.
- Fresh fruit salad: A medley of seasonal fruits can add brightness and balance to each serving, enhancing the overall freshness of your meal.
- Herbal tea: Serving this cake alongside a warm cup of herbal tea provides a soothing complement that rounds out any gathering or celebration.
- Chocolate sauce: A drizzle of chocolate sauce on the plate adds richness and an appealing contrast to the flavors of white chocolate and raspberry in every bite.
So there you have it! With these tips on making and serving your White Chocolate Raspberry Dream Cake, you’re all set to impress your guests or simply indulge yourself in this delicious creation. Happy baking!
Make Ahead and Storage
This White Chocolate Raspberry Dream Cake is perfect for meal prep! You can make it ahead of time and store it for later enjoyment. Follow these simple guidelines to ensure your cake stays fresh and delicious.
Storing Leftovers
- Store leftover cake in an airtight container in the refrigerator.
- It’s best enjoyed within 3-4 days for optimal freshness.
- If you’ve already sliced the cake, cover the cut sides with plastic wrap to maintain moisture.
Freezing
- To freeze the cake, wrap each layer tightly in plastic wrap and then aluminum foil.
- You can freeze the cake layers before frosting for up to 2 months.
- Thaw in the refrigerator overnight before frosting or serving.
Reheating
- If you prefer your cake slightly warm, you can microwave a slice for about 10-15 seconds.
- Avoid reheating the entire frosted cake; instead, enjoy it chilled or at room temperature for the best flavor.
FAQs
Here are some common questions about the White Chocolate Raspberry Dream Cake that may help you as you prepare this delightful dessert.
Can I make a gluten-free version of the White Chocolate Raspberry Dream Cake?
Absolutely! Substitute all-purpose flour with a gluten-free flour blend. Ensure that all other ingredients are also gluten-free to maintain consistency.
How do I prevent my White Chocolate Raspberry Dream Cake from falling apart?
To keep your cake layers sturdy, make sure they are completely cooled before stacking. Additionally, use a sturdy whipped cream that holds its shape well when frosting.
Can I use frozen raspberries instead of fresh ones?
Yes, frozen raspberries can be used in place of fresh ones. Just remember to thaw and drain them to prevent excess moisture in your filling.
What can I substitute for heavy whipping cream in this recipe?
You can use coconut cream or a plant-based whipped cream alternative if you’re looking for a dairy-free option.
Final Thoughts
I hope you find joy in creating this White Chocolate Raspberry Dream Cake! It’s a delightful treat that balances sweetness with a hint of tartness from the raspberries. Whether it’s for a special occasion or just because, this cake is sure to impress friends and family alike. Enjoy every bite and don’t forget to share your baking adventures!
White Chocolate Raspberry Dream Cake

Indulge in the delightful flavors of this White Chocolate Raspberry Dream Cake. This exquisite dessert features layers of moist cake, creamy white chocolate, and vibrant raspberries that create a harmonious blend of sweetness and tartness. Perfect for any occasion, from birthday celebrations to cozy family dinners, this cake is sure to impress your loved ones. The simple yet effective recipe makes it accessible for bakers of all skill levels, allowing everyone to experience the joy of creating something truly special.
- Prep Time: 20 minutes
- Cook Time: 30 minutes
- Total Time: 50 minutes
- Yield: Serves approximately 12 people 1x
- Category: Dessert
- Method: Baking
- Cuisine: American
Ingredients
- 2 1/2 cups all-purpose flour
- 2 teaspoons baking powder
- 1/2 teaspoon baking soda
- 1/2 teaspoon salt
- 1 cup unsalted butter
- 1 1/2 cups granulated sugar
- 4 large eggs
- 1 teaspoon vanilla extract
- 1 cup whole milk
- 1/2 cup sour cream
- 6 ounces white chocolate, melted
- 1 1/2 cups fresh raspberries
- 1/2 cup raspberry jam
- 2 cups heavy whipping cream
- 2 tablespoons powdered sugar
- 1 teaspoon vanilla extract
Instructions
- Preheat your oven to 350°F (175°C) and prepare two 9-inch round cake pans.
- In a bowl, whisk together flour, baking powder, baking soda, and salt.
- Cream butter and sugar until fluffy; then add eggs one at a time.
- Mix in vanilla extract, followed by the milk-sour cream mixture.
- Gradually combine dry ingredients with the wet mixture; fold in melted white chocolate.
- Divide batter between pans and bake for 25-30 minutes until a toothpick comes out clean.
- Let cakes cool before assembling with raspberry filling and whipped cream.
Nutrition
- Serving Size: 1 slice (120g)
- Calories: 392
- Sugar: 28g
- Sodium: 162mg
- Fat: 27g
- Saturated Fat: 16g
- Unsaturated Fat: 10g
- Trans Fat: 0g
- Carbohydrates: 34g
- Fiber: 1g
- Protein: 4g
- Cholesterol: 73mg